I’ve always loved pinball machines and I really love electronics. So, the obvious tie-in would be to combine the two! I’ve decided to embark upon creating my own pinball machine from the ground up! I want to do everything but I might be willing to compromise on the cabinet since I suck at woodworking. I can fix my house but a finish carpenter I’ll never be. However, I’m not going to compromise on the electronics since that’s what I love to do.
This project is going to take awhile (I’m thinking at least two years) and this is for fun so I’m not all worked up about the time schedule. I do have to fit in time to play Destiny after all. There are a lot of different approaches to pinball design with a lot of the more modern machines cramming LED dot displays into the backbox of the machine. I’m not fond of this approach because it’s distracting for a player and takes their attention off of the playfield. Ergo lame. I like the more old school approaches with just the LED panels. So, the first thing I want to do is build a display!
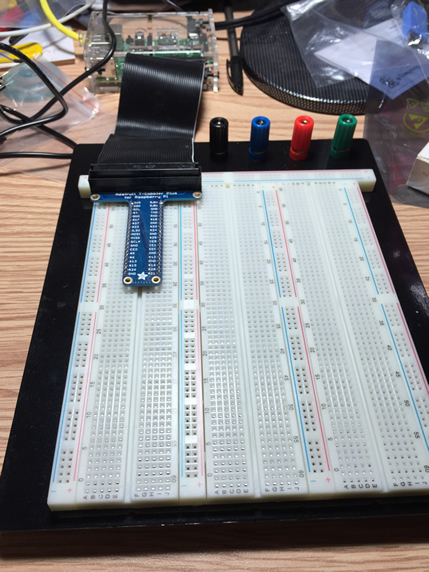
I think that I want to use a small computer to control the display but I’m not sure exactly what I want to use. I’m going to start out with a Raspberry Pi as the control computer just so I can prototype some approaches. I bought a Raspberry Pi 1 B (which promptly went obsolete and was replaced by the Raspberry Pi 2 Model B :^}) and a breakout cable and a case all from Adafruit. I’ve got it all hooked up and I’m dying to play with it. Take a look!
I got it up and running very quickly just by following the directions on the Adafruit site. Very easy. I then setup a VNC connection to my mac after my initial SSH into the Pi. I might post that later… I can now access the Raspberry Pi over a graphical user interface and do some slick development work (hopefully). Nice!
However, this is all a distraction for what I want to do which is to use python to flip a bit on the Pi GPIO bus. I downloaded the awesome RPi.GPIO 0.5.9 package. The best part was that after I downloaded it I found out that I just had to use the simple commands:
sudo apt-get update
sudo apt-get install python-rpi.gpio python3-rpi.gpio
and bam! it is installed! All hail Hypnotoad!
I started to play around with the GPIO package in python but I couldn’t do it interactively from idle3 (I like Python 3, foo on your Python 2) since I wasn’t running idle3 as root. I fired up LeafPad on the Pi and wrote a small script.
#!/usr/bin/python3
import RPi.GPIO as GPIO

GPIO.setmode(GPIO.BOARD)
GPIO.setup(21, GPIO.OUT)
GPIO.output(21, GPIO.HIGH)
I ran the program
sudo ./firstlight.pyand then took a voltmeter to measure the output voltage fulling expecting something around 3.3 V. Nothing. Well, a bunch of changing voltages that look like in input. I then realized I needed to expand my test code and I had grand visions of an interactive system that you could use to control the GPIO. Fortunately, before starting that project I found WebIOPi which is a slick UI for doing GPIO.
I tried to grab it using the Midori web broswer but that was a slow horrid mess of bad requests and the like. I then grabbed it using wget unpacked it and then installed it.
wget http://sourceforge.net/projects/webiopi/files/WebIOPi-0.7.0.tar.gz
tar -xvf WebIOPi-0.7.0.tar.gz
cd WebIOPi-0.7.0.tar.gz
sudo ./setup.sh
Quite a bit of time passed for it to install WebIOPi becuase it made a bunch of items and installed the software for both versions of Python on my system. YMMV. Once installed I ran WebIOPi on the Pi using
sudo webiopiIt told me to point my web browser to an internal address which I typed into my Safari. A serviceable web interface appeared! I jumped over the the pin control and clicked on some pins. I rapidly realized that WebIOPi doesn’t work for all of the pins of my Pi Model 1 b+, only the pins present on the earlier boards. This was proved when I manipulated some of the higher numbered pins and that worked fine. So, back to scripting I went. Once I realized that the numbers present on my Adafruit T-Cobbler Plus were channels from the Broadcom chip and that I needed to use the GPIO.setmode(GPIO.BCM) setup everything worked fine.
The final, working script was
#!/usr/bin/python3
import RPi.GPIO as GPIO

GPIO.setmode(GPIO.BCM)
GPIO.setup(21, GPIO.OUT)
GPIO.output(21, GPIO.HIGH)
That set labeled “#21” on my Adafruit T-Cobbler Plus to high! Finally, first light on the board!
Now for some really fun stuff.